Frame Work:
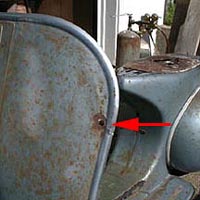
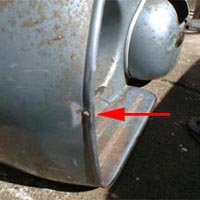
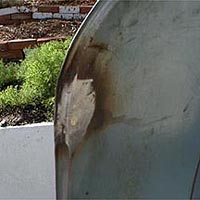
The frame had 2 holes drilled
in the legshields that were used to mount side mirrors. I didn't want
to Bondo them as they were visible from both sides. My neighbor
suggested brazing the holes so we didn't have too much heat distortion.
Brazing is similar to welding except the temperature is much lower. The
steel only needs to be heated to a red hot state and then brass is
added to seal the hole. Below is the original condition of the holes.
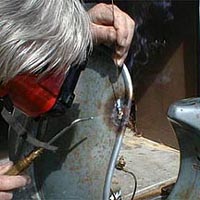
We used an oxyacetelene torch
to heat the legshield around the hole until it was red hot and then
added brass which was dipped in flux. It was tricky not to blow through
the legsheilds and we decided to leave a mess to be ground down rather
than expertly brazing the first time round.
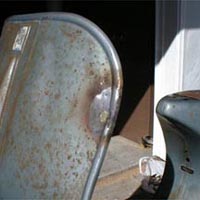
After grinding the extra brass
down we were left with a perfectly smooth filled hole. The only clue to
the fact that it was there, is the difference in metal color which will
disappear with the paint job. If any blemishes are visible in the
brazed surface you can add lead to fill them up by using only a blow
torch.
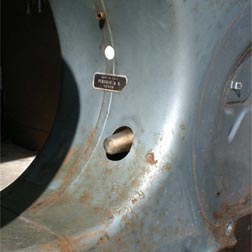
Another frame modification
that was made was to add a sight glass hole for the P200E gas tank/oil
tank combination. I got a template from an old P200 frame I had and
copied it onto a piece of paper. We measured down with a tape measure
and drilled a pilot hole. From that point we aligned everything then
removed metal with an air powered grinder until it all fit.
The final
frame modification was to the tank filler cap. All my other bikes
always slowly leaked gas/oil at the filler cap regardless of the
condition of the gasket or the pressure I screwed it down with. The
result is a mess - I had seen some nice motorcycle tank caps that had
been adapted for Lambrettas but I had never seen it done to a Vespa.
SIP has some retrofit caps but they bolt to the top of the tank and I
wanted a flush look. I looked at different bikes and found that the
Yamaha Seca II (Diversion in the UK) had a nice sized filler cap that
looked good too. I contacted MIDS Cycle
Salvage and they
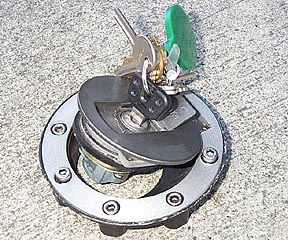
found a cap in good condition and an old tank flange. I didn't want the
entire tank so they found a trashed one and cut the filler mount out of
it and sent it to me - really nice guys!
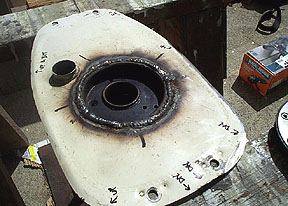
I ground off the old Vespa
filler cap assembly and trimed down the flange from the Yamaha to have
about 1/4" of steel all the way around. I then marked out a new hole in
the Vespa tank and cut it out with a jigsaw. With a little grinding I
made the old face of the Yamaha tank mount flush with the new Vespa
tank face. I took it to Tanner Welding in SF who charged me $40 to weld
it in place. It wasn't the best job I had ever seen and the Vespa tank
face had warped from the heat - still it was gas tight and in place.
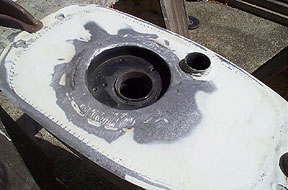
The next step was to grind
down the welds to get everything as flush as possible before a final
sand with 150 grit paper and using the inevitable filler to smooth
everything out.
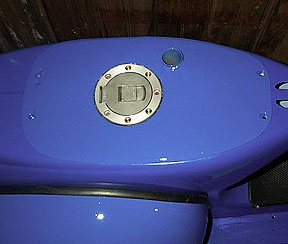
The final result came out
pretty well. A Vespa fuel tap tool fits through the filler neck too.The
Yamaha filler assembly has a small drain in it that allows spilled gas
to go back into the tank which should solve any spilling problems.
The only downside to this
conversion is that the rear rack will no longer work on this bike
because the filler cap is so large.Also, I think I may not be able to
fill the tank as full as the original Vespa. I plan to adapt a single
seat to fit the back anyway so it should work out.

Above is a shot of the welded
and painted tank before the filler cap is installed.
|