|
 |
 |
 |
 |
 |
 |
||||||||||||
Frame and BodyVespa Small Frame Front Hub |
Small Frame Front Hub & Forks RebuildThis front hub is from my auto project and
shows a small frame front end from a mid 70s to 80s bike. The earlier
small frames had an integral hub and axle, but the newer type (like
this one) have a removable front hub and separate axle. I started by
taking the entire front end apart and then blasted the parts and had
them painted. This page shows the reassembly including bearings, speedo
drive, and front shock.
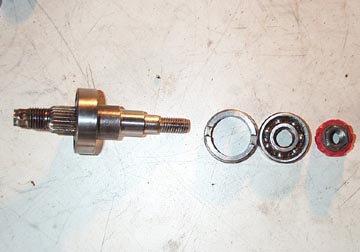
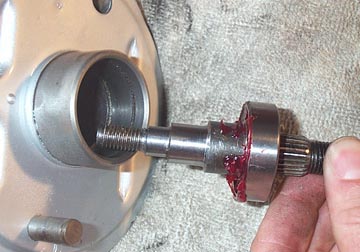
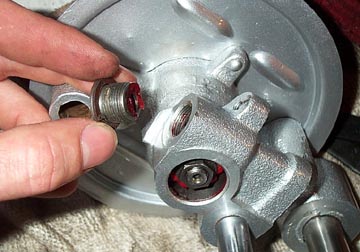
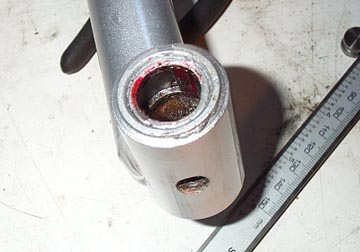
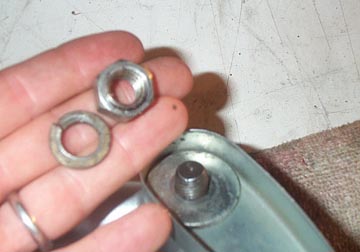
The axle on the small frame
fork actually rotates inside the hub. From left to right in the shot
above is the axle with one bearing fitted on the spline side, the
retaining ring, the second axle bearing, and the axle nut with speedo
drive. Â
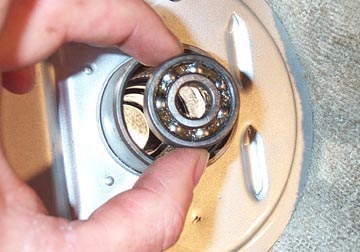
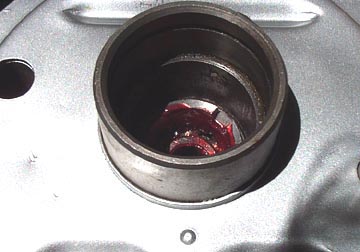
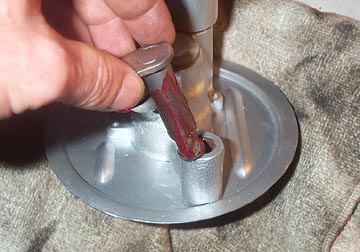
Take the free bearing and
place it in the hub from the brake shoe side. Support the hub on a
block of wood and use a socket or suitable sized pipe and a hammer to
drive the bearing in to the hub. Â
It should go all the way in
beyond the threaded area inside the hub. Â
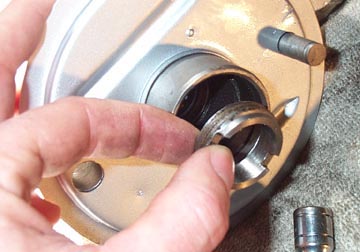
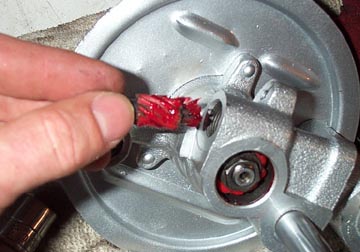
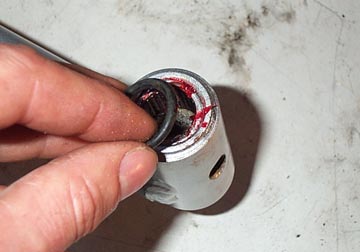
Then fit the retaining ring.
This has two cut outs in the side to aid in tightening it. I used a
metal bar with the same diameter of the hole with a pair of vice grips
on it to tighten it up successfully. Â
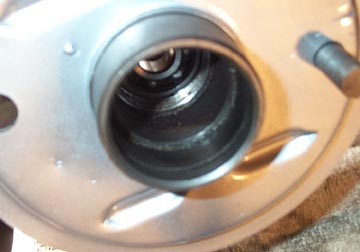
Grease up the bearing well
before the next step of fitting the axle.
Grease up the bearing on the
axle and fit it in to the hub. Mine went in pretty easily but you may
find you need to tap it in with a rubber hammer. If you use a normal
hammer make sure to use a piece of wood between the axle and the hammer
to protect the axle nut threads.
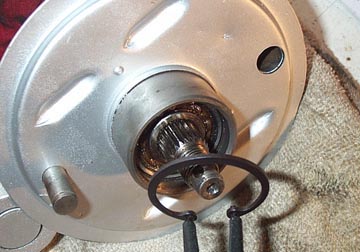
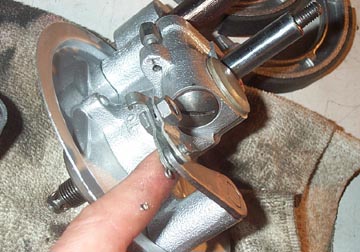
Once the axle is in, fit the
circlip to hold everything in place.
Flip the hub over to the other
side and grease and fit the axle nut with the integral speedo drive
gear. Tighten this down with a socket. You can temporarily fit the
front rotating hub on the axle end to allow you to get the nut tight.
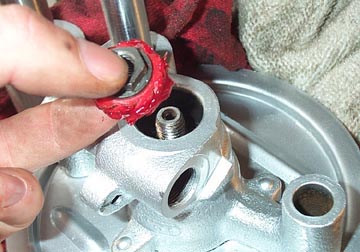
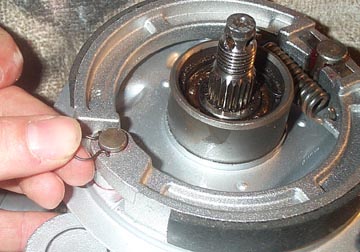
Grease and fit the speedo
drive...
..followed by the cover blank
which can be tightened with a large flathead screwdriver. Note the
small fiber gasket around the rim of the cover plate. Also fit the snap
in plastic cover plate over the end of the axle.
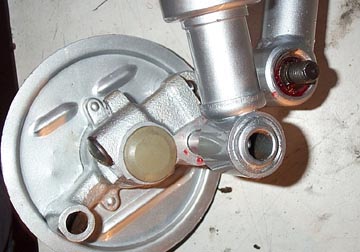
Grease up the brake arm and
push it through the hole in the hub.
Make sure the cable connector
is on the same side as where the cable will run before fitting the
brake shoes.
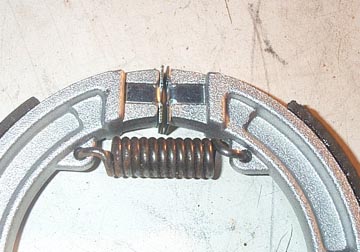
I always find it easier to fit
the brake shoes as one item with the spring in place. Before fitting
these fit the metal end tabs over the shoe ends and grease them
lightly. To put the brake shoes in place, place one shoe over the end
pivot and the other against the brake cam. Then take the other shoe and
fit the end loosely to the pivot and use a screwdriver to lever it over
the brake cam until it drops in to place. This may take some practice.
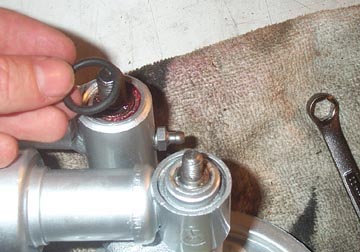
Lastly (and very importantly)
fit the circlip over the end pivot to hold the shoes in place.
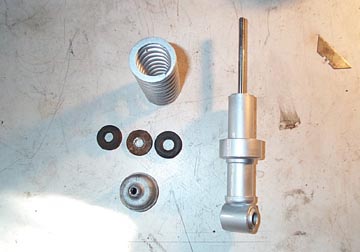
Now we can move on to the
front shock. Above are the parts to the front shock. It also has a
plastic piece which covers the spring itself, but I prefer the look
without this piece so I left it out. The oil damper inside the shock
was also left alone because it was working well. Â
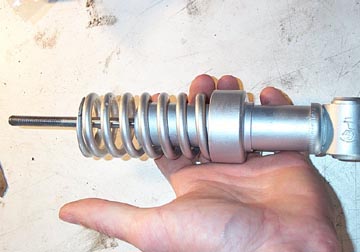
The first step is to fit the
spring. As far as I can tell there is no specific up or down to the
spring. Â
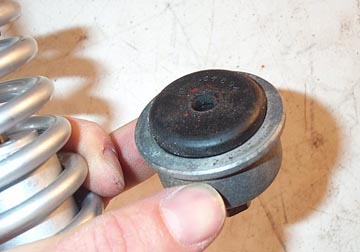
Take the top cap and fit the
large rubber bung inside it. This gives some protection if you ever
bottom out the shock on the road. Â
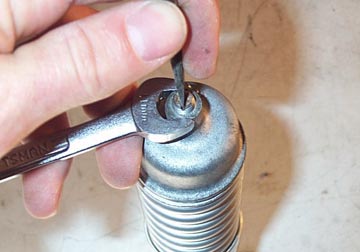
Using a small flathead
screwdriver, insert it in to the top of the damper shaft to stop it
rotating while using a wrench to turn the cap down on the shaft. You'll
need about 3/4 of an inch of thread showing to instal the shock in the
forks.
Place the first larger rubber
ring around the top of the fork.
Place the threaded part of the
damper shaft through the shock mount and follow it with the second
large rubber ring.
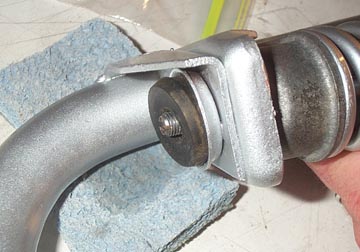
And finally place the large
washer, lock washer, and nut on the end of the threaded rod and tighten
it down. While tightening make sure the base of the shock has the hole
through it in the same direction as the fork pivot hole. If the damper
shaft rotates use the flathead screwdriver in the slot as before.
Moving back to the forks, fit
the small needle rollers to each side of the main pivot point. Use
grease to hold these in place. Also (not shown in this image) now is a
good time to fit the grease nipple in the hole underneath the pivot if
it has been removed.
On the hub side of the forks,
fit the single O-ring and hold it in place with a dab of grease.
Carefully slide the shock and
fork pivot pins their holes making sure no needle bearings drop out.
This picture was taken before the brake shoe work but the idea is the
same.
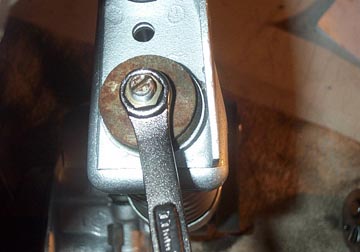
Fit another O-ring on the fork
pivot....
...followed by the pivot link
spanning between the two pins. On each pin, use a washer, lock washer
and nut and tighten them down securely. The final step to the forks is
to snap on the fork link cover. Next Section --> |
|||||||||||||||||