|
 |
 |
 |
 |
 |
 |
||||||||||||
Frame and BodyVespa 70s & Small Frame Steering Locks Vespa 50s-60s Steering Locks |
50s-60s Steering LocksOne thing that always seem to get lost on scooters that have been sitting for a while are the keys. This section shows how to replace the steering lock on a most 50's-60's Vespa large frame bikes. Unfortunately this involves dropping the entire front fork assembly.... To replace a large frame 50s-60s steering lock you'll need:
Â
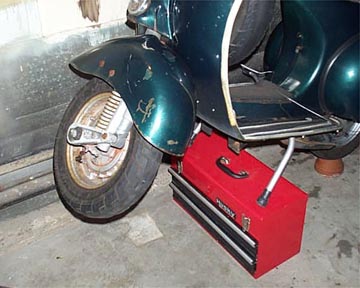
First set something under the stand feet that will raise the bike up. I use an old tool chest and then a something else (a flower pot) under the rear wheel. The idea is that the front wheel should be 18" or so of the ground to allow you to remove the forks. Â
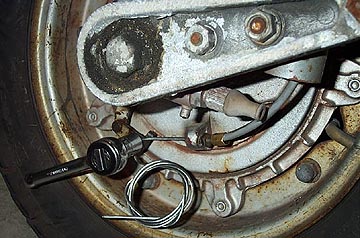
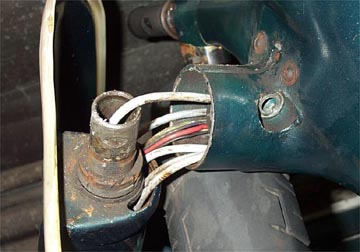
The front brake cable has to be completely removed from the front hub. Use an 11mm wrench or socket to loosen the pinch bolt on the steel cable inner. Once loose pull the cable out of the hub mounted screw adjuster so that it is hanging down from where it emerges from the fork tube. My bike was missing the speedo cable when these shots were taken so it is not shown. It can remain in place and be dealt with at the top end. Â
Older Vespas have a single pinch bolt that connects the headset to the top of the fork tube. Both sides will try to rotate if you only loosen one side. The bolt side is a 15mm nut and the nut side is a 14mm nut. Use two socket drivers to hold one side and loosen the other. The bolt can then be totally removed. Unscrew the headlight rim by removing the two screws that hold it in place, and then swing it out from the bike as if there was a hinge at the top. There is a small pin at the top that needs to be pulled clear of the casting. Inside you will see all the control cables and wires. Remove the speedometer drive cable from the speedo by unscrewing it with your fingers. Â
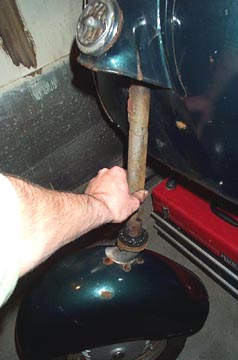
To pull the headset off, put your knees on either side of the front wheel and start twisting the headset from left to right while lifting up. The control cables should give you enough slack to do this. If the front brake cable seems to be caught, feed it into the bottom of the fork tube down near the front hub. Â
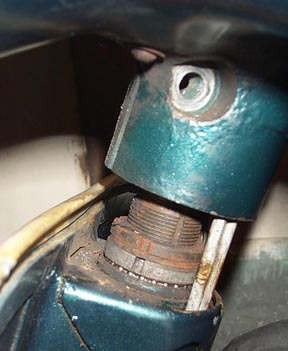
The headset should have enough slack in the control cables and electrical loom to just flop back off the fork tube. The front brake cable can now be removed from the forks as a whole by pulling it up and out of the forks. The steering retaining nuts and washer can now be seen at the top of the fork tube. These will have to be removed to let the forks drop out towards the ground. Â
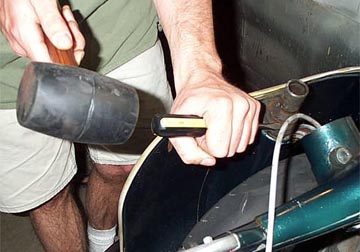
For the next shot I should warn you that it can go disasterously wrong...easily. If you do not have a retaining ring remover tool, the next best thing is to loosen the retaining ring with a flathead and a mallet. Insert the tip into one of the four slots in the retaining ring and hammer to try to turn the ring anti-clockwise. It works if you are careful, but the flathead can slip and scratch the paint. Â
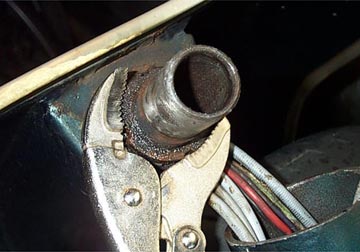
If all else fails I have had success with a set of vice grips. Just make sure you are only grabbing the top retaining ring - careful and slowly twist in an anti-clockwise direction. Â
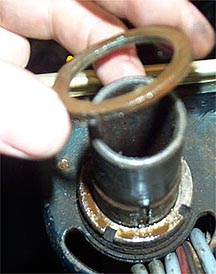
Once you have unthreaded the retaining ring there is a small flat ring with a slot that slides into a groove in the headset tube. This is so that it cannot turn with the upper retaining ring, and serves as a type of lock washer. If it is stubborn you can tap a screwdriver in between the lower retaining ring and the flat washer. Â
Before removing the final lower retaining ring you may want to stuff something into the control cable holes, and support the front wheel of the bike. Older bikes have uncaged bearings at both ends of the fork tube, which means they may come rolling out all over the floor. Usually there is enough grease still in the bearing race to hold them in place. I changed mine to a P200 upper bearing race when I put the bike together. The P200 ones have a cage around the perimeter that hold the ball bearings in place, but alow their outer surface to roll against the bearing races. To loosen the lower retaining rindg, use the same technique used to remove the upper ring. The forks will probably start to drop as you do this, unless supported. Â
Now that the forks can come free, the same problem of loose bearings exists at the bottom of the race. There should be either 21 or 22 ball bearings (I can't remember but will check) at the bottom of the fork tube. Depending on your model these may be in a caged assembly. These run in a two part race of which half is pressed onto the fork tube above a larger dust cover, and a frame mounted part at the bottom of the fork tube. Â Now that the forks are free getting the lock out is very easy. The lock is mounted from the inside of the fork tube, with a threaded retaining ring on the outside. The retaining ring is sometimes hard to remove, but I have found that wrapping it in electrical tape to protect the finish, and then clamping vice grips on it works very well. Next Section --> |
|||||||||||||||||