|
 |
 |
 |
 |
 |
 |
||||||||||||
Vespa Post 1979 Large Frame Engine WorkShift Cross Replacement |
Shift Cross Replacement (P200)When the shift cross starts to wear you'll find the machine will quickly jump out of gear and then back in causing lurching. It is a relatively cheap part (around $25) but it is buried right in the center of the engine and requires a fair bit of work to get to it. The P200 and PX200 have different axles and different shift crosses. The photos here show a P200E and should also work with a PX200E with some adaptation. The first thing to do is split the casings which gives access to the transmission. Once the casings are split continue with the following steps. The shift cross is located within the output shaft which terminates at the rear wheel. The axle can turn within the four separate gears and is slotted to allow the shift cross to move up and down, engaging only one gear at a time. The external selector box connects to a long plunger which moves the selector to the correct gear.
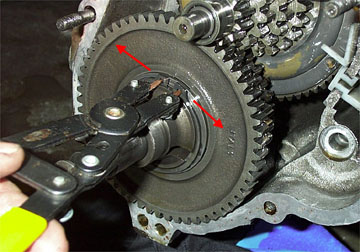
To gain access to the shift cross all the gears need to be removed from the output shaft. They are retained by a large circlip and a tabbed shim washer. Use a pair of circlip pliers to expand the circlip out and remove the tabbed shim washer.
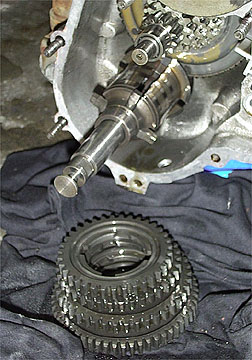
At this point the gears should come off the shaft. If they are held up try rotating the shift cross until they come free. Make sure you remove them and keep them stacked in exactly the same way they came off. If they are reversed the shifter will no longer align with the correct gear. Once all the gears are off the shaft, the edge of the shift cross can be visible through the slots.
The plunger is threaded into the shift cross with a LEFT HAND THREAD which basically means to tighten it, it needs to be turned counter clockwise. This is because the engine would try to unscrew the plunger if it was a typical thread due to the rotation of the gears. Remove the plunger and be careful not to loose the small washer on the end which fits between the plunger and the shift cross. See the picture below for more info.
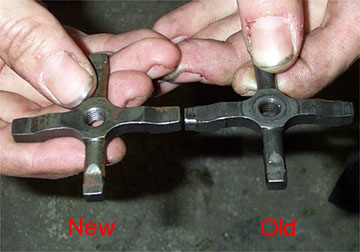
The shift cross has two rounded legs which can be used to rotate it 90 degrees and remove it from the output shaft slot. Once removed it can be inspected for wear. Any wear will be evident by rounded over ends to each of the legs. Below is a shot of a new shift cross on the left compared to the one removed from a high mileage machine. If you'd like more detail, click the picture for a high resolution image.
Replace the shift cross in the same way it was removed and tighten the plunger down. Remeber that there is a thick washer between the cross and the plunger. If this is not installed your gear to cross alignment will be off. You can also use a bit of thread lock on the plunger threads to be safe. Be sure to install the new shift cross as shown below because if it is in backwards the gear selection will be incorrect.
Re-assembly is the reverse of assembly. The only tolerance to check is between the end float of the gear cluster and the circlip that retains it. This should be between 0.15 - 0.40mm and needs to be checked with two feeler gauges so that the tolerance is measured when the gears are flat on the shaft. See below for the correct tolerance check with two feeler gauges.
Next Section --> |
|||||||||||||||||