|
 |
 |
 |
 |
 |
 |
||||||||||||
Vespa Post 1979 Large Frame Engine WorkBearings Clutch Rebuilding |
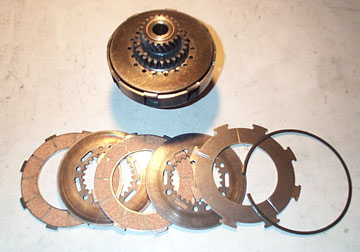
Clutch RebuildUsually when the clutch is not functioning well, nine times out of ten the plates need to be replaced. These images are from a P200 clutch but large frame clutches are similar but may have different amounts of springs. Once the clutch has been removed changing the plates and any other work is easy. You'll need:
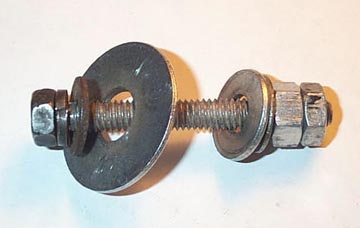
A special Vespa clutch compressor is a nice tool, but you can make one for under $4 at your local hardware store from standard nuts, bolts and washers. You are looking for:
Above is a view of a compressor I made
from parts in the garage. Take the clutch with you to the hardware
store to be sure of getting the right bits.
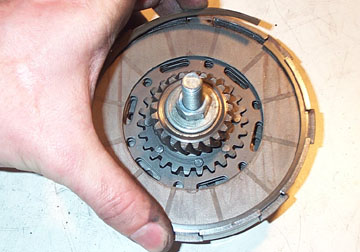
Put the clutch compressor through the
central crank hole. Make sure the washer on the side with the spring
holes is totally covering the central hole, and then tighten up the
compressor. You only need to tighten it enough so that the pressure on
the circular perimeter retaining ring is released. Remove the ring by
pulling it out of the groove.
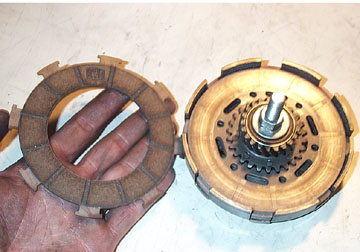
Once the ring is removed, the first one
sided cork plate can be removed. This plate differs from all the other
plates because it has different shaped tabs and must be the last plate
installed. These tabs lock the cork plates to the outer basket. The
next plate is a full steel plate which is teethed around the interior
perimeter to lock it to the clutch center. Remove all the free
alternating steel and cork clutch plates.
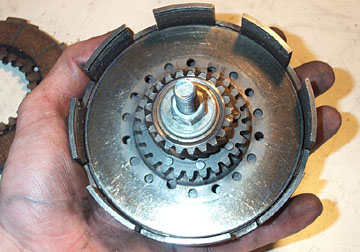
The final steel clutch plate is riveted
to the clutch center gear. The clutch compressor needs to be removed in
order to remove the center gear from the basket and to get access to
the springs. Once the compressor is removed I usually get a large
socket to set the clutch on so that the spring cups are not touching
the work surface.
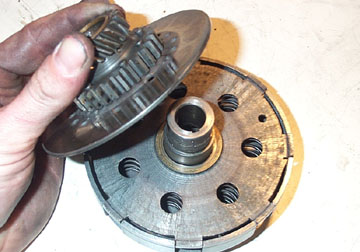
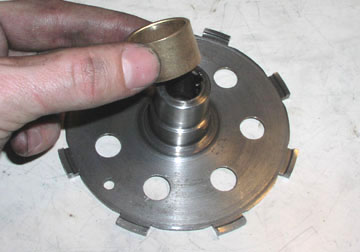
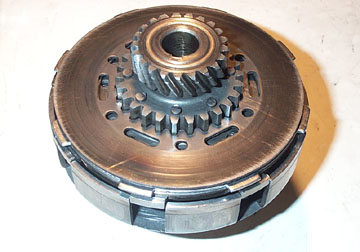
The clutch center gear and plate should
be easily removable from the main clutch body. In the clutch above the
brass bush came off with the center plate instead of remaining on the
body, but I'll describe what should go where in the next couple of
steps.
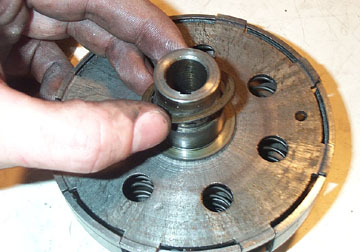
Remove the small brass bushing. These
are very cheap and easy to get through a scooter dealer and should
always be replaced when doing clutch work.
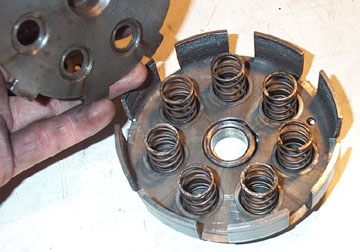
Remove the main clutch body and the
springs and spring cups will be visible. You can see the large socket
in the center supporting the clutch basket. This makes it easy to deal
with the spring caps because they will be held in place by gravity. If
you bought new springs remove the old ones and place the new ones in
the cups.
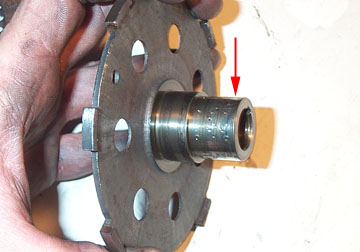
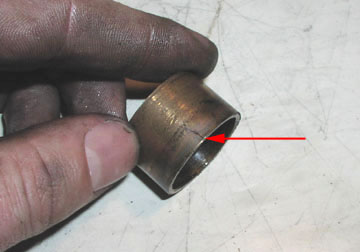
Inspect the clutch main body for wear.
The interior components of the clutch don't run on bearings, but run on
brass bushes at the friction points. This clutch had a cracked brass
bushing which allowed the bushing to slightly expand in size and lock
to the clutch center gear instead. I'm not sure how the damage above
happened on the surface of where the bushing should be, but this entire
part should be replaced and a new brass bushing will be added to the
new piece.
The cracked bushing can be driven out of
the clutch center gear by using a suitable sized socket and hammer to
pound it out from the back side. In order not to bend the steel plate,
don't support the piece by the plate while pounding the bushing.
Usually they are a loose fit and just holding the center in your hand
is enough support to bang it out.
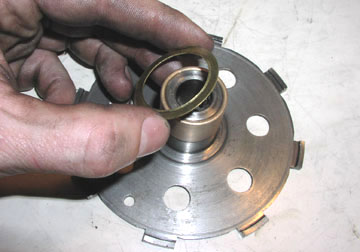
Fit a new brash bushing to the main
clutch body. This should be a nice tight fit so the bushing does not
turn. Use a large socket or flat piece of metal to tap it until the
lips are flush.
Then fit the second brass bush ring with
the small lip facing upwards. This is a very loose fit and can rotate
freely.
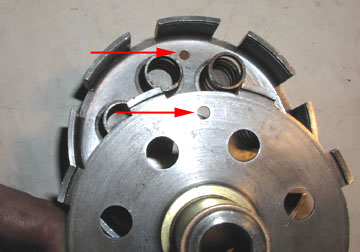
Place the main clutch center over the
springs so that they seat in the recesses on the back side. I have
always aligned the two holes shown above with arrows but I don't know
if it really makes a difference.
Fit the main clutch center and spin it
to be sure it rotates well. Above is a shot of the clutch plates in
their correct order from left to right.
Fit the first cork plate and make sure
the tabs are closely aligned with the tabs of the main clutch as it
will make them easier to drop down in the basket when the clutch is
compressed.
Fit a steel plate which interfaces with
clutch center teeth. Keep alternating cork and steel plates until you
get to the final one side cork plate.
Once all the plates are in and the final
one side cork plate fitted, compress the clutch and help all the cork
plate steel tabs drop down in the clutch basket.
Finally, fit the retaining ring in the
groove in the clutch basket and your clutch is ready to reinstall. |
|||||||||||||||||