|
 |
 |
 |
 |
 |
 |
||||||||||||
Vespa Post 1979 Large Frame Engine WorkCush Drive Overhaul |
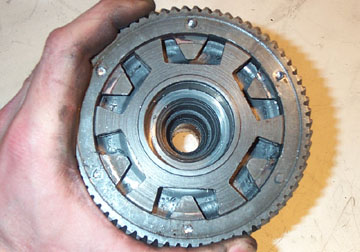
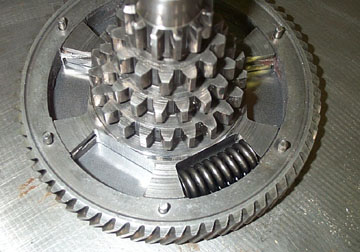
Cush Drive OverhaulThe cush drive is within the primary gear of the input shaft (Xmas tree) on a large frame Vespa. Basically this system allows the power from the crank, and the gears of the Xmas tree to have a bit of give between them and ease snatching gears or jumpy starts. The large primary gear is not connected directly to the Xmas tree, but is set on springs which can compress as power is applied. If you've been through your clutch and your bike is still snatchy, then the cush drive is the final area to inspect. This page assumes you've already removed the primary gear and Xmas tree assembly. You'll need:
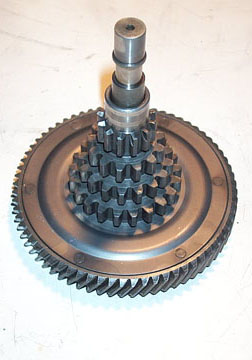
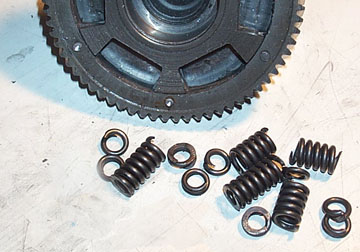
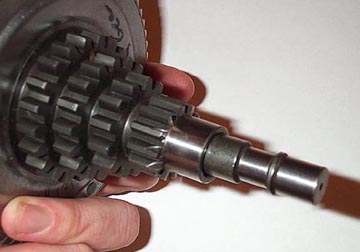
Above is a shot of a primary
drive input shaft taken from a PX150. The cush drive is located in
between the two metal plates which are held together with rivets. In
order to determine if the springs are shot you can sometimes tell by
shaking the entire assembly. If you here rattling they are definitely
gone and need replacing.
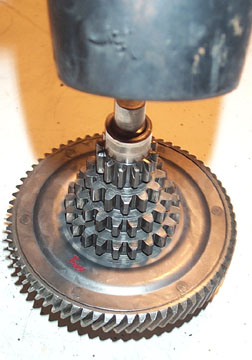
There is also a single bearing
within the input shaft which can be removed and replaced if necessary.
Since this motor was in bad shape there was a lot of metal bits in the
oil and the bearing was shot so I removed and replaced it. To remove
the bearing, use circlip pliers to remove the circlip (snap ring) and
then flip the assembly over.
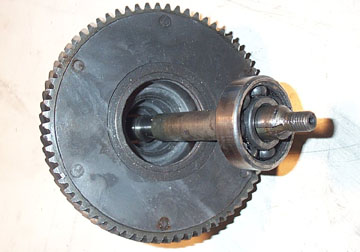
Support the primary drive
above a flat work surface so that the central shaft is not touching the
surface. Using a rubber mallet or hammer and wood block, start tapping
the shaft down through the gear cluster.
The shaft has a lip that will
catch the bearing and force it out of the primary drive. Clean the
bearing in gasoline and check it for wear and to see if it turns
smoothly. If not it can be replaced after the cush drive springs have
been replaced.
Carefully center punch each
rivet as a starter for drilling out the rivets. Using a drill, drill
the heads off each rivet so that the metal face plate can be removed.
The cush drive replacement kit comes with new steel plates so don't
worry about messing them up while drilling. Once the face is separated
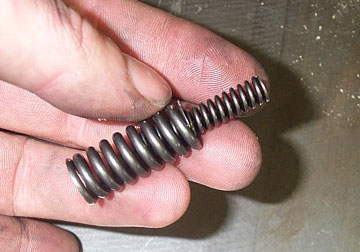
the (hopefully) broken springs can be removed.
Pry out the springs if they
don't fall out in pieces like the ones in this drive did.
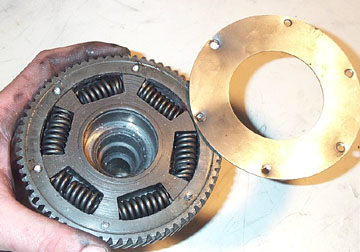
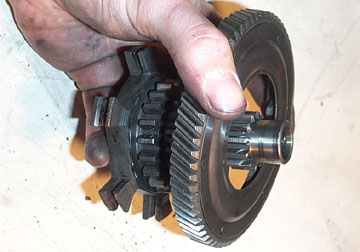
Hold the primary drive in one
hand, and twist the Xmas tree gear cluster in the other and the tabs in
the cush drive area will separate....
...and the two parts will come
apart. Now you can work on removing the remaining rivets either by
using a drill of similar diameter and a drill press, or by using a
small punch to punch them out of the primary gear. The primary gear is
much tougher steel than the rivets so drilling them without a drill
press is another option.
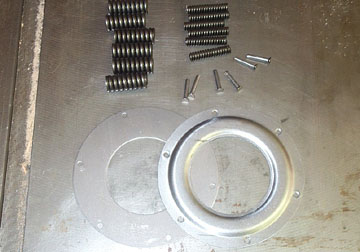
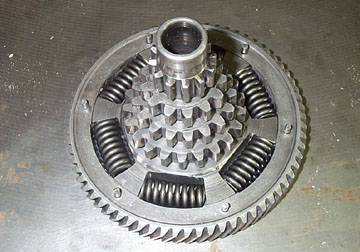
The cush drive repair kit
consists of a new backplate (flat) a new front plate (with a bevel),
six new outer springs (for 125 and 150cc engines), six inner springs
(used in conjunction with the larger springs on 200cc bikes), and six
rivets.
Start by placing the back
steel plate with the slightly countersunk holes facing out. Fit each
rivet to the primary and use something like a sheet of cardboard to
flip the whole unit over without loosing the rivets, and place it on a
hard steel surface.
In 200cc motors insert the
small spring inside the larger spring. In 125cc and 150cc motors use
only the outer spring.
Put the center back in the
primary gear and rotate it so the tabs engage. Note that the primary
tabs will only connect flush with the primary in one direction. Once
the center is in start fitting the springs one at a time. You may need
a screwdriver to fit help fit them.
Before adding the cover plate,
make sure that all the springs are placed correctly and that the rivets
are installed and ready to be hammered.
Fit the remaining plate with
the bevel facing away from the primary gear. With the bottom of the
rivet supported on a hard, flat steel surface, begin to hammer at the
exposed end to mushroom it over.
Hammer the rivets nice and
flat as they rotate very closely to the casing. For contrast you can
see the un-hammered rivet shown with the red arrow against the green
arrow which is nicely mushroomed flat against the plate.
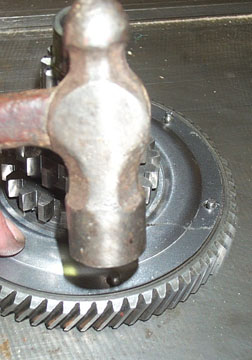
To rebuild the rest of the
drive ready for installation in to the motor, first place the shaft all
the through the center of the gears.
Then support the primary drive
with equal sized blocks of wood on either side and use a socket large
enough so it only touches the outr race of the new bearing, and hammer
it home.
Finally reinstall the circlip
over the bearing, and the drive is ready to go back in the motor.. |
|||||||||||||||||