|
 |
 |
 |
 |
 |
 |
||||||||||||
Lambretta Engine WorkGeneralLambretta |
Removing a Lambretta EngineThe Lambretta engine is very accessible but there are some projects that are much easier if the engine is removed from the frame. This series of images is from a Series III Lambretta but should be very similar for all Series I - III bikes. You'll need:
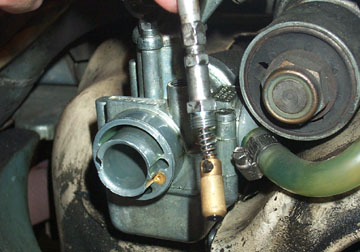
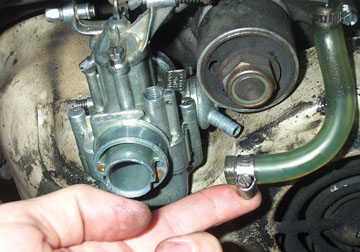
Start by putting the bike on the stand. If the bike is in running condition, turn off the gasoline, start the engine and run it until the carb runs dry. You can also drain the oil but it is not a required step (but you'll have to do it later if you are planning a rebuild). 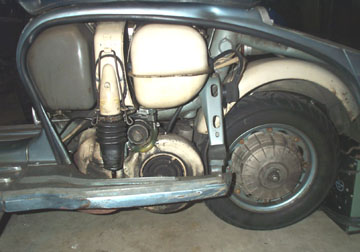 Remove both side panels from the bike and have a look at what is connected from the frame to the engine. On the left side of the bike, the fuel line, throttle cable, choke cable, and air filter intake rubber all need to be disconnected from the motor.  To remove the air filter neck, loosen the retaining collar at the carb mouth with a flathead screwdriver, remove the two clips that hold the air filter in place, and pull the filter and neck assembly off the bike. It is not required to remove the whole air filter, but I find it easier to get it off the bike instead of messing with the rubber neck in the way of the carb. You can also remove the carb from the engine and leave all the cables attached, but I wanted the carb off the bike as well so I left it attached to the intake manifold.
Remove the throttle cable from the carb throttle arm by manually opening the arm to release the slack, and then pushing the end nipple out of the guide. The whole cable can then be pushed back through the adjuster.
Use an adjustable wrench to loosen the clutch plunger. Pull the plunger out of the carb body and tuck it away in the frame so it is out of the way.
Depending on the clip you have on the carb end of your fuel line, either loosen it with a flathead or squeeze the two ends of the clip together to get the fuel line off the carb intake. Make sure the fuel valve is turned off before removing the line.
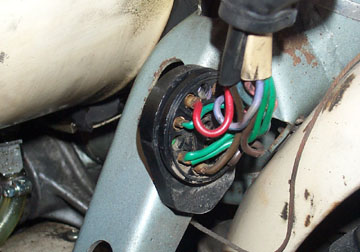
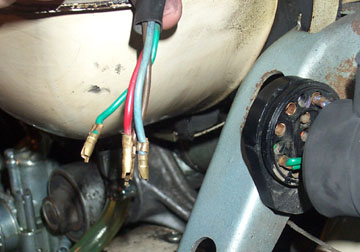
Locate where the electrical wires come out of the engine on the top side of the fan housing and follow them back to the junction box on the frame arm. Write down how all the connections are made and then unplug the engine side from the junction box.
Once disconnected follow the wires back and make sure they are free from the frame. Typically you'll have to thread them back through the fuel tank clamps to get them free.
Remove the single fan shroud bolt that holds the ground wire in place just in front of the rear wheel. This completes all the left side disconnects, and we can move on to the right hand side.
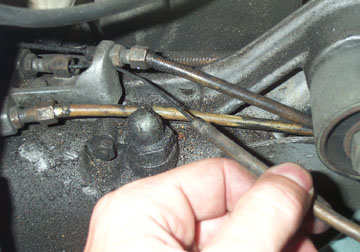
The right hand side connections are the spark plug, the gear cables, the clutch cable, and the rear brake cable. Start by removing the spark plug lead from the plug. Follow the control cables along the upper side of the engine casing and you'll find the gear and clutch connections. Use a 3.5mm allen key and a xxmm wrench to stop the nipple from turning to loosen all the nipples and then pull the inner cables through and free. Note that the far nipple on the gear selector block is taller than the others.
Move back to the adjuster block and pull the inner and outer cable through the adjuster block. Stuff the cables somewhere away from the engine or use a zip tie to hold them all out of your way.
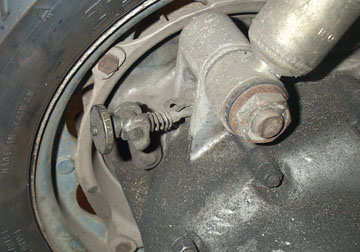
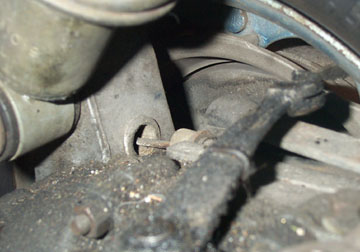
Find the rear brake adjuster just inside the rear hub. You can either disconnect the rear brake at the foot pedal under the floorboards, or remove the adjuster from the end of the cable as I did.
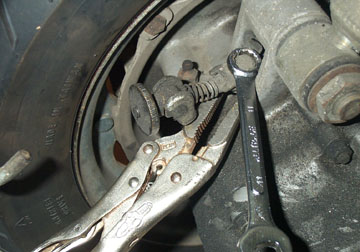
Using two wrenches, loosen the single bolt that connects the cable to the adjuster. You may have to fully remove the bolt to get the adjuster free.
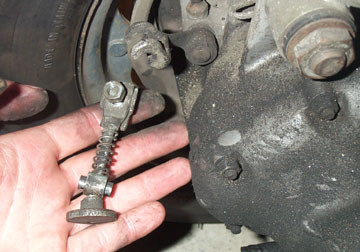
With the adjuster free, straighten the cable so it can be pushed back through the lower shock support casting...
...and push the entire cable back and clear from the engine casing.
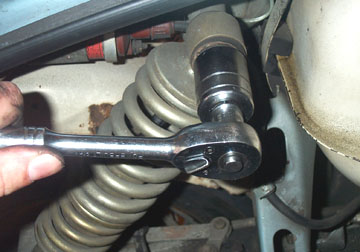
Remove the 24mm nut and washer on the upper and lower shock mounts. Once removed you may find that the shock is hard to get off. The trick is to pull each end just a small bit at a time so it comes squarely off the mounting posts. Once off the rear wheel will be able to hit the inside of the rear mudguard.
At this point you may want to wedge a milk crate, car jack, or something else between the ground and the rear of the bike. This will make removing the engine a little easier especially if you are doing this on your own.
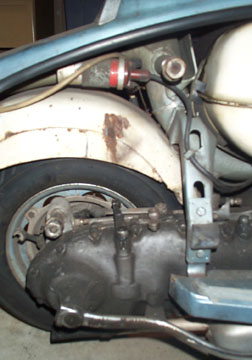
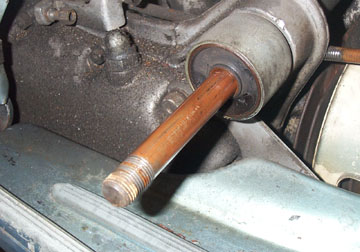
Remove the center 24mm nut from the main pivot point bolt. Sometimes the entire bolt can rotate instead of just the nut, so you may need a second wrench on the other side to get the nut off.
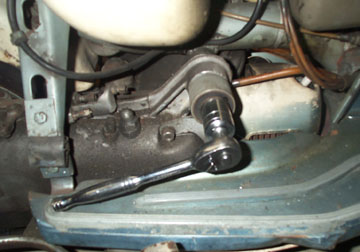
Only one nut needs to come off but the pictures show both nuts removed. Using either a punch to the center of the bolt, or a block and hammer start pounding the pivot bolt out of the engine mounts. The block or punch is used so that the threads are not damaged. Once the bolt is flush with the mount I like to use a flathead screwdriver and hammer to keep pushing the bolt through. This is a nice trick because once the first mount is free the screwdriver will not allow the engine to completely drop out.
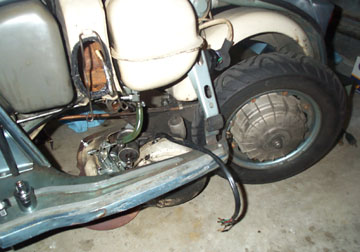
With the bolt fully removed, do a final check for anything else that may still be connected. If everything is clear, remove the screwdriver holding the engine in place and lower the engine to the ground. It is easiest to have a friend help lift the bike off the engine but if you are alone then you will have to work the engine out of the frame by pulling the rear wheel out to the left.
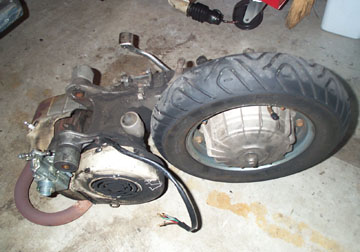
Once the engine is free you can move on to rebuilds, crank removal, and other projects that are much easier with the motor on a bench. If you would like to watch a
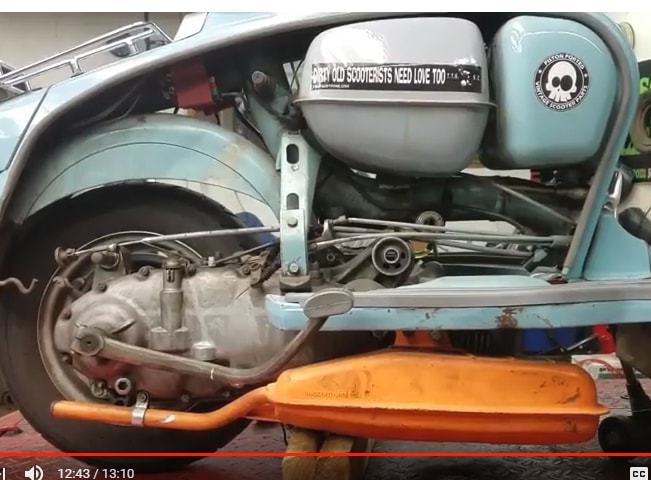
video of this process with a few more helpful tips click the image
below for a tutorial from Piston
Ported
Next Section --> |
|||||||||||||||||