|
 |
 |
 |
 |
 |
 |
||||||||||||
Lambretta Engine WorkGeneralLambrettaDrive Side Bearing & Oil Seal Removal Drive Side Bearing & Oil Seal Installation Flywheel Side Bearing & Oil Seal Installation Resources |
Installing a Lambretta Drive Side Oil Seal & BearingThe drive side of a Lambretta has one large main bearing and a single oil seal to stop the gasoline/air mixture leaking in to the transmission and visa/versa. The following steps are from a Lambretta GP 200 but can be adapted to most Lambretta models starting with the Series I bikes. The images show a stripped GP 200 block with all the components removed. You'll need:
The best thing to start is to freeze the drive side bearing. Freezing metal just causes it to slightly contract. It is nothing you can see or feel but it will make putting the parts together much easier. 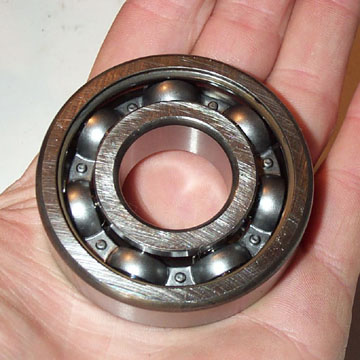
Keep it frozen until you need to install it. Check the new main bearing to make sure it is spinning freely. 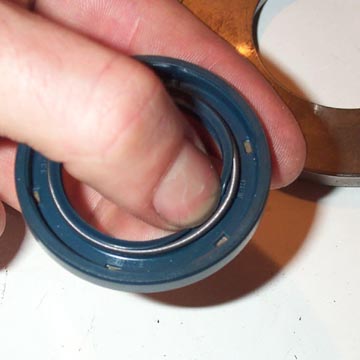 Oil seals are made from plastic around a metal core. They have a lip that has a circular spring around the outside face. This spring is what causes the seal to work because it puts pressure around where the crank passes through the center. The shot above shows the lip slightly pulled back to show the circular spring. Typically the spring goes to the side that has any pressure. In a Lambretta engine that side is always facing towards the crank due to the primary compression that happens as the piston falls in the bore.
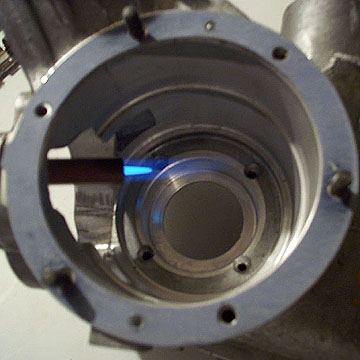
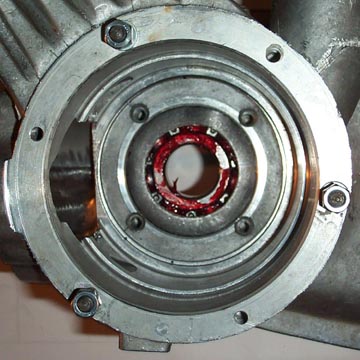
The easy way to get the bearing in to the aluminum casing is to heat the casing and feeze the bearing. This shrinks the bearing and expands the casing just enough to make installation easier. Since there are no oil seals or gaskets in this casing you can heat it up with a blow torch until water sizzles on it. You will need a large socket or large thick washer with a pipe or block of wood to pound the bearing in to place. Make sure that the washer or sockets only makes contact with the outer lip of the bearing which is past the ball bearings themselves. If you make contact with any of the rotating parts you could damage them as the bearing is hammered in.
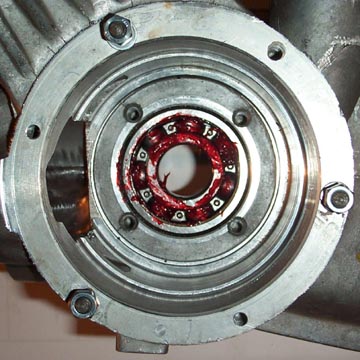
Start hammering the bearing in from the crank side. Make periodic checks on the transmission side to be sure the bearing is hit all the way in. The shot above shows it only partially in the bore. There should be no space between the shoulder of the bearing and the aluminum casing.
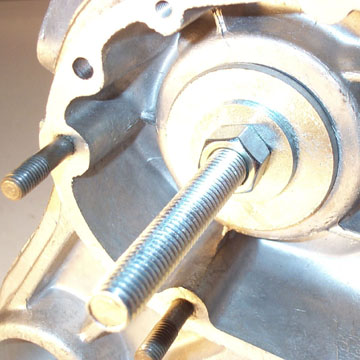
If the bearing is unusually stubborn you can make an easy tool to draw it in to place with washers and bolts from your local hardware store. Basically find two washers (1) with a diameter large enough to cover the trasmission side bearing hole, and (2) to cover just up to the edge of the bearing on the crank side. Find a bolt and pass it through the center and start cranking away. In the shot above I used a second washer becasue the hole in the main washer was too big for the bolt nut. Once you are happy that the bearing is all the way in, take a break and let the casings cool before installing the oil seal as noted below.
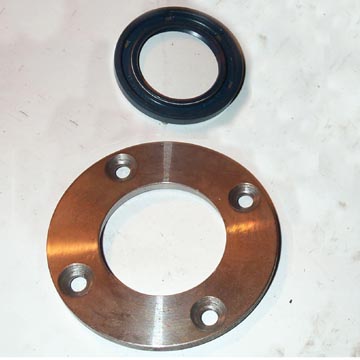
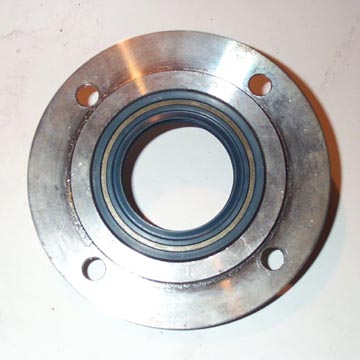
The main oil seal is an easy fit in to a metal flange which is then bolted in place. The flange has two distinct sides and can only be installed with the countersunk screw holes side facing out towards the crank. The oil seal is set into the hole in the center. Again, the spring goes towards the crank and the seal is fitted from the other side of the flange. The seal can be pushed in place with just your fingers.
Here's a shot of the seal fitted in to the flange from the drive side. The face of the seal should be as flush as possible with the backside of the flange.
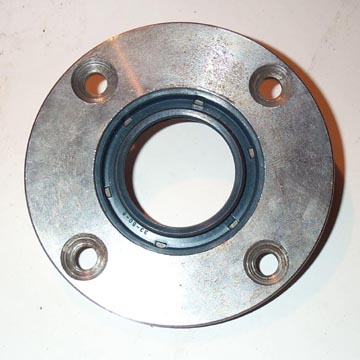
And here's a final shot of the flange with the oil seal fitted from the crank side. The next step is moving on to fitiing the flange to the casing itself.
Grease up the drive side bearing with high melting point grease. Clean the bolt holes the best you can .
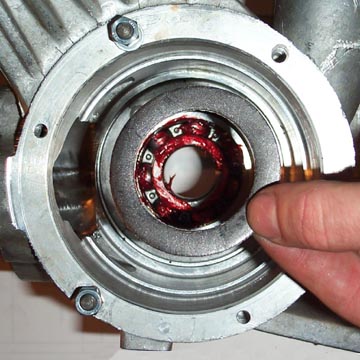
The next step is to fit the bearing washer. This is a weird washer which is more like a gasket than a washer. It can be fit in either direction, but make sure the edges are down against the bearing edge as shown below.
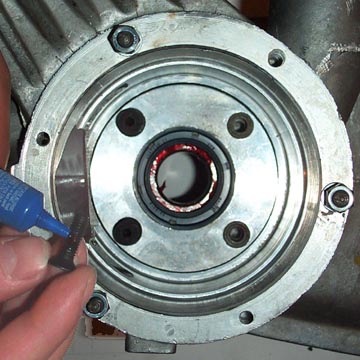
Once it is seated well it is time to mount the drive flange with the oil seal. On original motors there are 4 Phillips head screws that are approximately 16mm long. I find these a bit of a pain to tighten without the head of the Phillips screwdriver jumping out. An alternative is to use cap screws with an allen head drive.
I also also found that the thread holes are deeper and can easily accept a 20mm cap screw which are very common and easy to find. To be sure this was not some weird issue with my motor casings, if you use 20mm screws/bolts try inserting them in the holes first to make sure you don't run out of thread. When you finally put them in for good, use thread lock on the threads before you insert the cap screws. If these ever come out they will immediatley rub against the side of the crank web and start filling your motor with metal filings which destroy everything. If you are really worried about them you can side punch each cap screw to stop it from rotating.
First tighten the scews until the start to get tight, and then work your way around turning about 1/4 trun at a time until you can't turn them anymore.
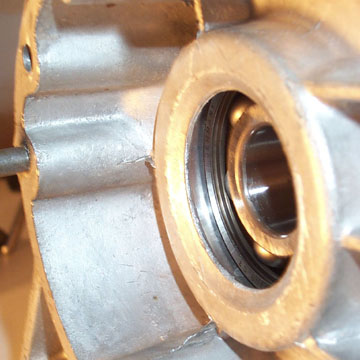
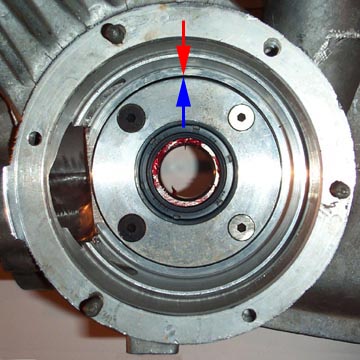
Above is a final shot of the bearing and drive seal in place. Make sure the flange is flush with the casing all the way around where the red and blue arrows meet Next Section --> |
|||||||||||||||||