|
 |
 |
 |
 |
 |
 |
||||||||||
Lambretta Kits
200cc Casings Installing a TS1
125/150cc Casings Imola 185 Resources |
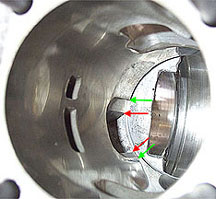
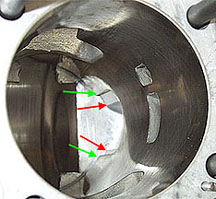
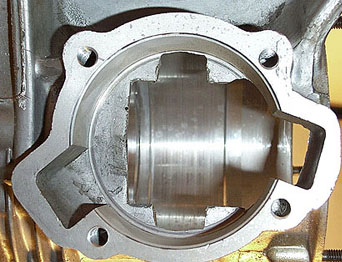
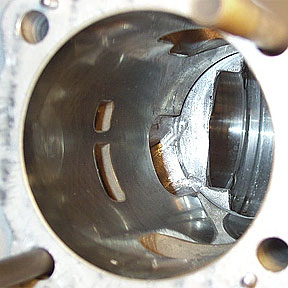
Installing a TS1 kitThis may end up being a large section. A TS1 will install on standard 200cc casings but since I had bare casings with no bearings I decided to go a little further and see what happens. So far I have only opened out the casings to fit the new barrel transfers. I still need to polish them properly before installing the kit. Anyway here is where I am up to: I found that when the TS1 was placed on the bare casings the cast casing transfers did not align with the new transfers in the barrel as shown below. The red arrow is the casing opening and the green arrow is the barrel opening. The left photo is of the drive side transfer and the right is the mag side.
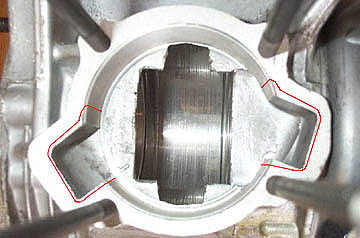
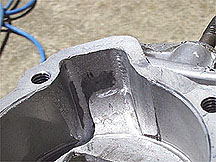
I threaded the four barrel studs to align the barrel properly and then traced the line of where the barrel and casing met. I used ink on the barrel gasket face and slid it down onto the casings. When removed it showed the exact line of the barrel on the casing. Below is a shot of the spigot opening with lines drawn where metal needs to be removed.
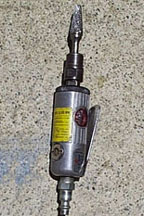
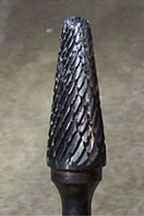
Next is the fun part...but also the dangerous one. I used an air powered die-grinder with a carbide bit to slowly remove metal around the transfers. These transfers can be opened much larger if you really want to, but they are close to the threaded holes for the barrel studs and may weaken them. The gasket face also needs to have a fair bit of surface to join with the barrel and make an air tight seal. The air grinder revs up to 25,000 RPM and has interchangeable bits for tight areas (see below).
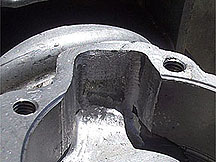
I basically just rounded out the transfers to the new lines. These are shots of the ports before I have polished them with emery paper until they shine. At first I tried this with an electric drill and a stone bit and had no luck at all. The die-grinder and bit made all the difference. Drive side transfer is on the right and mag side is on the left |
|||||||||||||||