|
 |
 |
 |
 |
 |
 |
||||||||||
Lambretta Kits
200cc Casings TS1 Intake Work
125/150cc Casings Imola 185 Resources |
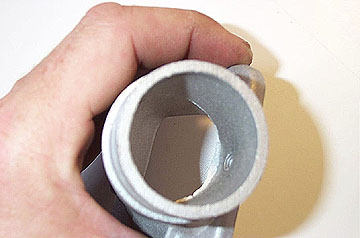
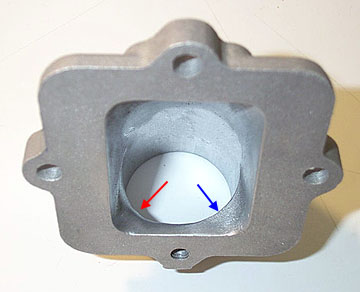
TS1 IntakeI started to look at all the bits of my TS1 kit while I wait to save the money for the rest. One area that I was not too impressed with was the finish of the inside of the intake manifold. There was a large casting joint inside on the bottom side and the corner angle where it turns into the reed valve seemed a little severe. The finish on the inside of the intake also had a rough surface.
So I decided that it can't hurt to try and make things a little smoother for the gasoline. Everything I have read about 2 stroke engines notes that a smoother route for the gasoline/air will result in a better performing engine. Please bear in mind that none of this is really necessary. I am sure if you just bolt a TS1 on it will run beautifully, but I had extra time and wanted the best fitting kit I could get. If I spent this much money on a kit it should function the best it can. |
|||||||||||||||