|
 |
 |
 |
 |
 |
 |
||||||||||||
Vespa Small Frame Engine WorkRemoving the Cylinder |
Removing the cylinderRemoving the cylinder is required to check the piston and bore condition and to split the cases. This shows the engine out of the bike, but I would guess it could be done in the bike as well with a little more effort. You'll need:
The first thing to be disconnected is the exhaust. Trace the exhaust to where it enters the barrel. It connects to an elbow which then connects to the cylinder. Remove the two 10mm nuts that connect the exhaust and the elbow.
You don't need to
remove the whole exhaust but in this rebuild I was taking it off anyway
and it does make things easier. You will still have to loosen the 17mm
swing arm bolt to allow the exhaust to be rotated off the cylinder
elbow. If you want to take off the whole exhaust then move to where the
exhaust connects to the swing arm and totally remove the single 17mm
bolt.
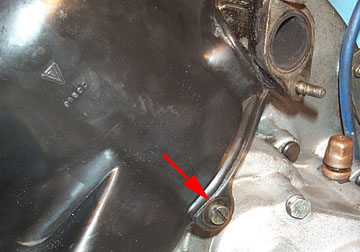
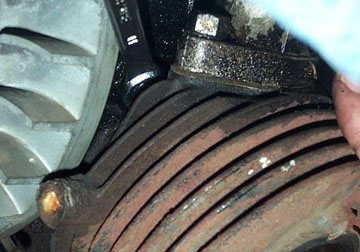
The cooling shroud will
be either plastic or metal depending on your model, but they both come
off the same way. On the fan side of the motor there is a screw and a
bolt through the lip of the shroud. On the backside of the motor is a
single screw to the casing as shown above.
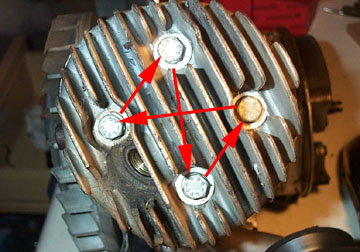
Remove the four 11mm nuts by loosening them about a 1/2 turn each and rotating to another nut until they are loose. This helps prevent any warping of the head during disassembly and reassembly.
Lift the cylinder head away from the cylinder to get your first look at the cylinder bore and the condition of the piston face. On this particular model of bike, the casing studs do not come through to the head. Instead the head bolts to the barrel, and then the barrel bolts on to the casings. If yours go straight through then you can skip ahead.
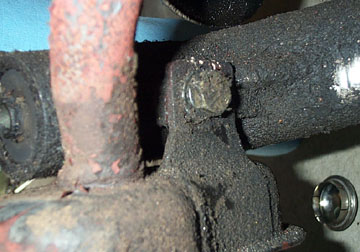
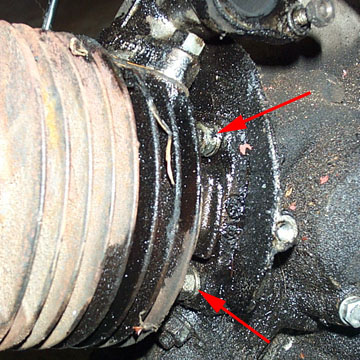
If you have the same stud set up this bike has, then use an open ended 11mm wrench to loosen the two short barrel stud nuts on the clutch side....
...and the two nuts on the flywheel side. With these removed the barrel will still stay in place due to the spigot, and you can move on to removing it completely.
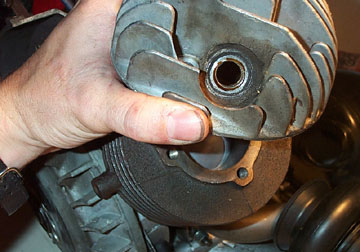
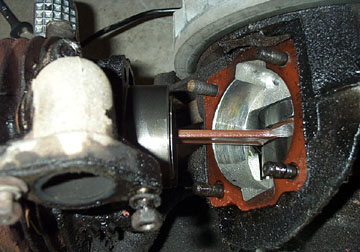
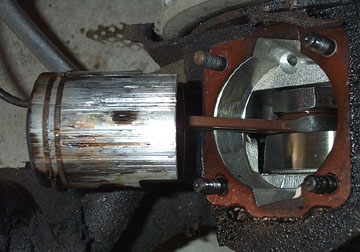
Carefully grab hold of the barrel and start pulling. Sometimes the base gasket will put up a fight, but you should replace this on the rebuild anyway so it does not matter if it gets destroyed. As you pull, the piston may remain in the bore until the crank rotates to top dead center.
The piston should then start to move down in the bore and eventually release from the cylinder. If your piston looks anything like the one above it is time for a new piston and rebore before the rebuild. Â |
|||||||||||||||||