1965 Jet BoardEngine |
Engine - RebuildingAfter stripping all the engine parts I started trying to locate what parts need to be replaced, and what parts I could find in today's market.
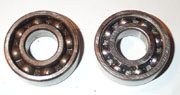
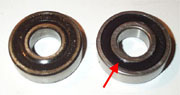
We replaced the main bearings since we had the engine open. I found a model number on the side of the original Nachi bearings (although they may have been replaced during the life span of the engine) and matched them to ones built today. The bearing number is 6203. They cost a total of $5 per side and are one of the most common bearings on the market. Above are two shots of either side of the old and new bearings side by side (old is on the left in both shots). The outside face (furthest from the crank) has a sealed race shown with a red arrow, but the inside is open for lubrication from the 2-stroke gasoline/oil mixture. I ordered the bearings with seals both sides, then removed the inside one, and flushed out the original grease.
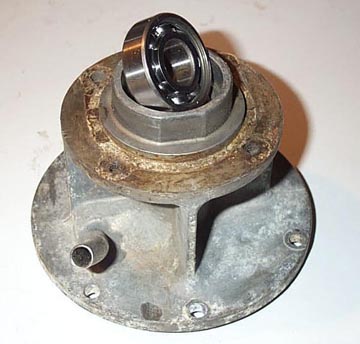
Fitting the bearings in the flanges was pretty simple. Above is a shot of the jet drive side flange with the bearing sitting in the flange before installation. I left the original oil seal as it was impossible to find a replacement, and they seemed in decent condition. I heated the flanges on either side of the main crankcase and pressed the bearing in with a rubber mallet and a flat steel plate. The sealed side of the race faces the oil seal, and does a pretty good gas/air sealing job too.
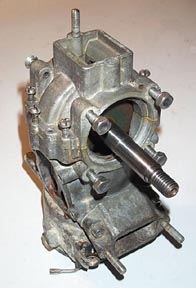
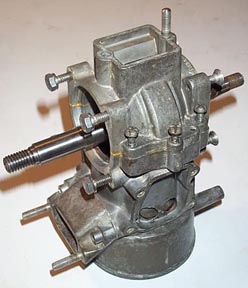
The shots of the engine during the rebuild are shown above. I don't know exactly how the engine is supposed to go together, but this system worked well for me. I installed the piston and crank, then I enclosed the crank by fitting the bottom of the main crankcase and torquing it down. The next step was to place the side flanges to center the crank. These slide on to the crank until the bearing stops on the crank shoulder where the tolerances between the inner race of the bearing and the crank are very close. This allows the jet drive side flange and the pull start side flange to get close enough to fit the four retaining bolts a couple of turns only. With a little heat from a blow torch, I was able to slowly crank in the two side flanges with the casing bolts, to draw the bearings onto the crank. I would only turn about 1/2 a turn on each of the four bolts to make sure the crank flange was drawn down in line with the crank shaft.
|
|||||||||||