|
ScootRS Lambretta Disk Brakes Installation
- Part 1
I bought this disk kit from ScootRS about a year ago and never
had the time to install it. I was also less than motivated since the
TS1 it was going in was still not complete.
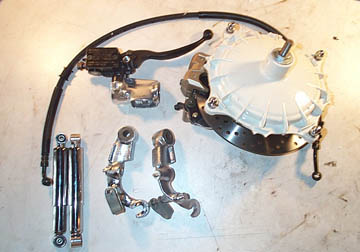
The kit came with the following:
- The hub, axle, disk, and caliper as a
single assembled unit. It even had rim nuts & washers.
- A master cylinder with brake switch
which was bolted to a TV style handlebar switch block (LI style also
available)
- New fork links with damper
attachments.
- Two new dampers with weld on top
clips.
- A rubber hydraulic line with all the
fittings at either end.
The only thing the kit didn't include
for a full installation was hydraulic fluid, bolts for the top damper
connections (easily found locally) and instructions (ScootRS recently
let me know that these are contained in the original purchase email).
The first step to the kit if you have non-damper style original forks
is to drop the forks
from the frame and remove the front wheel. The clips must be welded
in place and there is the possibility of damaging the suspension system
if the forks are not stripped. If you already have disk fork links you
can skip ahead to the hub installation.
The forks on the LI125 Special are the
same as GP 125/150 forks so the rubber stop blocks are a little
different than the standard LI. A fork compressor is handy for the job
but not needed. The first step is to use two sockets or a wrench and a
socket to remove the single large pivot bolt at the front of both legs
of the fork. Make sure you note which fork the cable guide is attached
to if yours is the bolt on type.
Once the nut is loose the bolt can be
pushed or tapped out from the other side.
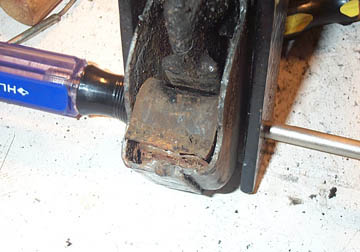
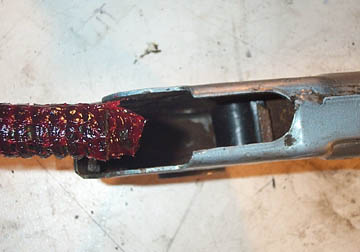
With GP forks I was able to push the
fork link back far enough to remove the rubber bottom stop even without
the fork compressor tool (even though it is shown here). The rubber
fork stop is held in place by a metal lip on either end. To remove it,
push in the lip and it should come free. Have a look at the later
pictures of the bare fork to get an idea of what the lip looks like
with the rubber stop removed.
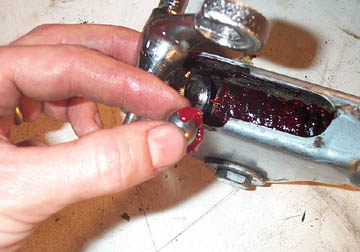
With the bottom stop out of the way
there should be enough slack between the spring and the link that you
can pull the link free of the forks. Be sure not to lose the metal ball
which sits in a cupped area in the center of the fork.
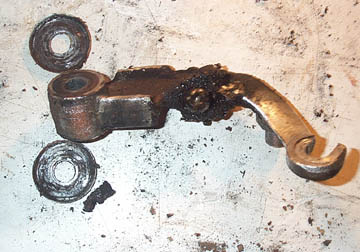
The washers on either side of the link
can simply be pulled off if they are stuck in place.
With the fork link out of the way, the
typically nasty single spring can be removed by pulling on the end
pieces. A central metal rod will also come out with it. Clean these and
place them to one side for the install.
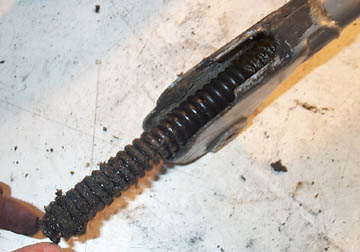
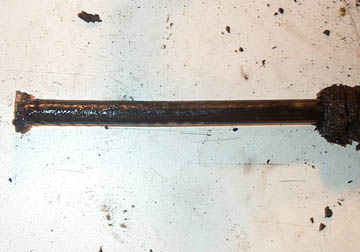
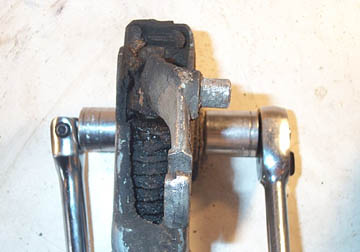
Above is a shot of the metal rod and
cup. Make sure it is not bent and check for major wear at the ball cup
end.
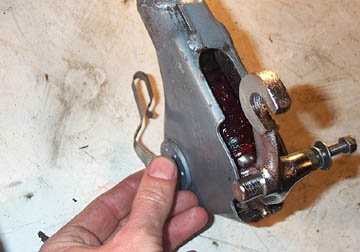
Once the spring is removed you'll be
able to see the other fork link bump stop. It comes out in the same way
as the lower one, by clipping in to a metal retainer. Or you can leave
it in if you don't plan on replacing it.
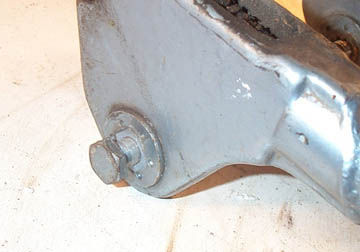
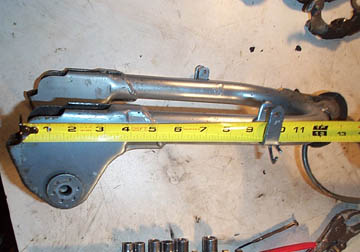
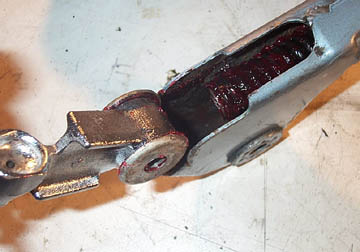
Now that the forks are bare you can mark
them for welding on the upper brackets for the new fork dampers. The
job of the damper is to stop the bouncing motion of the front of the
bike when it goes over a bump. They are highly recommended especially
for a disk set up. The clips supplied with the kit should be welded on
at 9 1/2" from the curve cut out at the bottom of the forks as shown
above. The bend in the clip will fit the tube diameter of the forks.
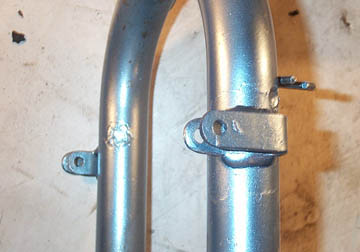
I found a can of spray paint that
matched the original Lambretta color pretty well. Once the welding was
complete I cleaned them up, gave a quick spray of primer over the bare
metal area, and then sprayed the clips. It is OK from far away but you
can tell when you are close up. Obviously if you have a nice paint job
you'd have to get the forks redone properly.
Grease up the fork spring and central
rod, and fit the upper fork stop rubber if you plan to replace them.
Slide the spring all the way in and the rod should slide up as well. It
may need a little wiggling to get it to slide up.
Now the new disk ling goes in with the
dished washers on each side facing in. Make sure the disk link offset
faces in towards where the wheel will be.
Grease up the small ball which goes in
between the bottom of the fork rod and the little recessed area in the
disk link.
Push the single large bolt through the
front of the forks. If you have the type of forks with a separate cable
holder don't forget to install it followed by the shake proof washer
and finally the nut. Don't tighten it more than finger tight for now.
Compress the fork spring enough to get the lower bump stop in to the
clip. There are a couple different methods to do this and the fork
compressor tool is the best option, but it can also be done with the
forks in a vice and a friend pulling back hard on the link. Make sure
it is a good friend - if they let go you'll get your fingers squashed.
Once the bottom fork stop is in, tighten the front pivot bolts with a
socket and wrench. The forks should now be put back in the frame.
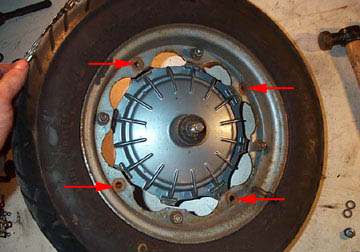
Remove the old brake shoe hub from the wheel rim by loosening
the four 14mm nuts around the perimeter. Make sure you only undo every
other nut as the other four nuts keep the wheel rims together.
Get the entire new hub and fit the wheel rim to it. Make sure
that if you have directional tires, the arrow faces in the direction of
forward rotation. The disk caliper should face out towards the right of
the bike. Take the wheel and hub unit and find the large slot in the
plate that hold the caliper on. This slot goes on to a peg on the right
hand side fork link and stops it from rotating with the wheel.
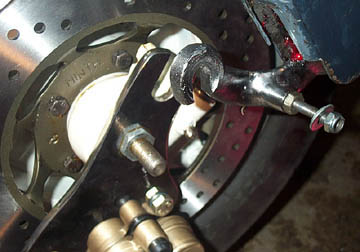
With the disk plate in the disk link slot, move the wheel axle
up into the axle slot and fit the thick washers which drop into the
recess in the end of the link. These are very critical to keeping your
front wheel on. I recommend getting brand new ones to be safe.
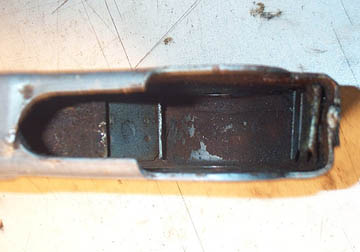
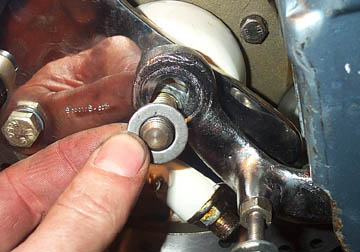
Above is a shot of the hub in place with the washer in the
correct location, ready for the axle nut. Put an axle nut on each side
of the axle and tighten them down fully. Make sure the wheel rotates
smoothly and doesn't have any wobble to it.
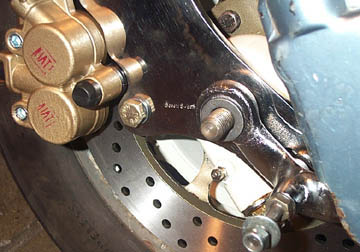
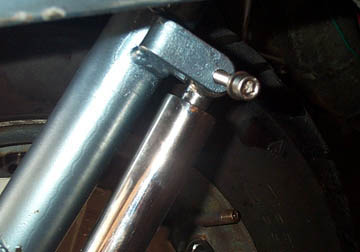
Fit the damper to the fork link with the supplied hardware as
shown above. I did find that my dampers rattled a little but this was
fixed by screwing the upper mount tighter on the casing.
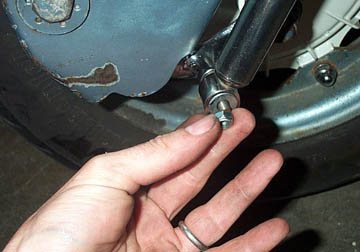
The final step in the lower end of the
hardware is to attach the top end of the damper on each side. Since
this hardware was not included I used a 6mm Allen head bolt with a
nylock nut on the inside.
|
|