VespaAutomatic ProjectFrame Work |
Frame Work
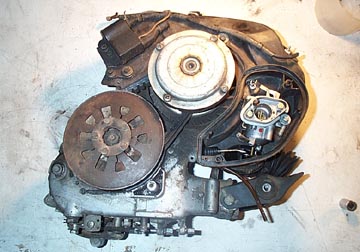
I was secretly hoping that this would be
an easy engine to drop in to an older frame, but of course that wasn't
true. The main problems is how tall the engine is, and how far the
barrel comes of the front of the motor.
The carb area is a little large too but
I think I can remedy this by tossing out the clunky carb box and adding
a filter directly to the body of the carb.
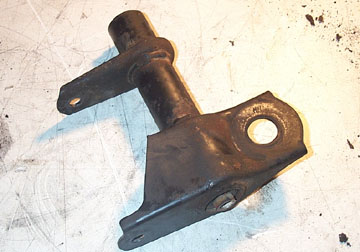
The Automatica fits into the same motor
mounts as a normal PK and a normal small frame, but there is a mounting
bracket that goes between the engine swing arm and the frame. Luckily
my motor came with this bracket so I thought I'd try to see if it would
bolt in place.
The large bolt hole mount in the bracket
got in the way of the frame, so I decided to remove it and add one
later in the correct position. Removing it was done with a hacksaw, and
made it so the bracket could pivot on the original motor mount holes.
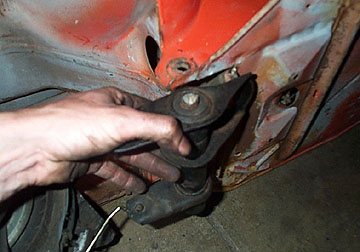
If the bracket is placed at an angle the
motor will fit without the cylinder. This was a good step because it
shows that in theory the motor should fit. The issue now is that the
inside of the frame under the gas tank is too low for the new motor.
Once I get some better measurements, I will have to remove the sheet
metal under the seat and rebuild it to make more room for the motor.
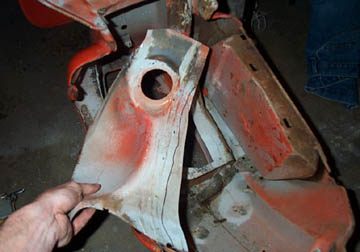
I marked the area of the frame I needed
to roughly remove and used a reciprocating saw to cut through the thin
metal. Once everything fits I will have to reinforce the frame to
compensate for the area I removed.
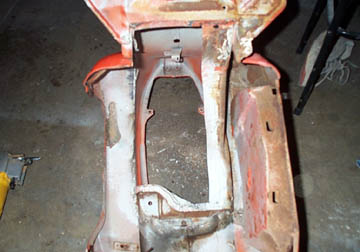
Another shot of the metal area that was
removed.
Now the under fuel tank area is a
straight hole through the frame. I am a little worried that I won't be
able to pull this off, but I guess I need to follow this one through or
be guilty of ruining a Vespa frame.
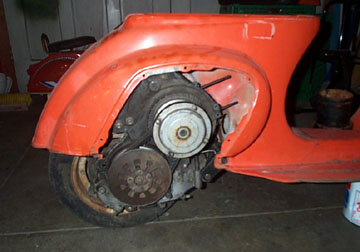
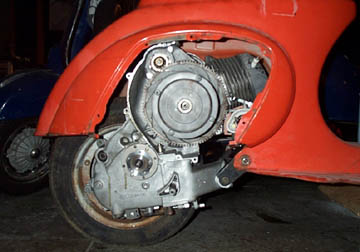
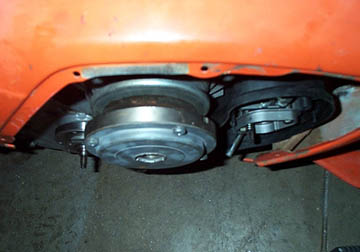
I fitted the motor with the motor
bracket and actaully managed to fit it without. I also started with the
air filter box in place but realized it would need to be removed to fit
well. In the shot above the rear shock isn't fitted but I am happy with
the layout of the motor and the way the rear wheel falls in relation to
the frame.
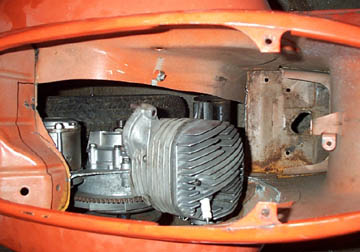
The motor was fitted without the cooling
hood on the first try. I marked the area near the rear shock mount with
a pen as more metal will need to be removed.
The last problem will be to have a look
at the upper drive pulley and see how it grows when the motor is
running...or dos it shrink? I'm not sure but it may get close to the
side door. Next Section --> |
|||||||||||||||||