Electric Start??
Let me first say that there is every
possibility that this may not work at all. I got this idea after
working with my VBA electric start bike and seeing how simple the
system was. As I was thinking it over a company called ScootRS in
Vietnam came out with a system and it got me motivated to get this
project off the ground.
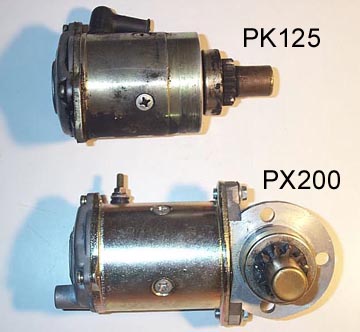
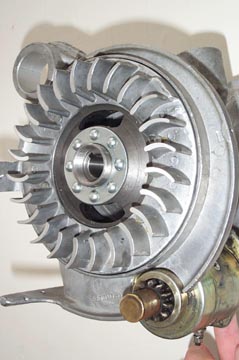
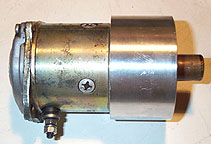
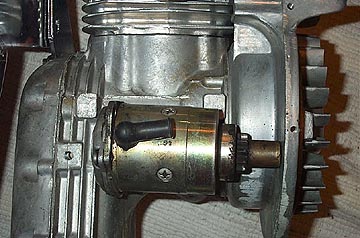
I want to use a standard starter that I
know can turn over a 200cc+ engine without too much effort. The PX200
(above) uses a starter with a 90 degree change to a bendix gear that
extends off the drive shaft. I took the one off my VBA and tried to
place it under the Lambretta crankcase but the design made it stick far
too low and I was worried about ground clearance.
Looking through old scooter manuals I
found an image of a small frame PK125 electric start which used the
same extension gear but was in a direct line with the motor (shown
above). I managed to score one off Ebay for only $8.00. Using an
existing Vespa motor means if there are ever any problems I can order
any of the parts, or a whole new motor without any hassles.
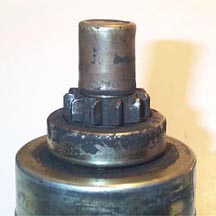 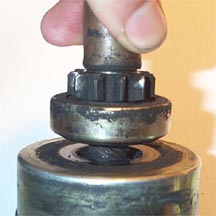
Above is a shot of the extending gear
which raises as the motor is turned. It has enough travel to engage
with a flywheel mounted ring gear when activated, and then drop down
after the engine is turning.
The plan is to cut a hole through the
bottom of the mag side flange so that the gear can pass through and
engage with a machined ring gear which will be attached to the
flywheel. I bought a second mag flange to experiment on so I should be
able to get the placement correct. I have also drawn up a diagram of
how I think the motor will fit against the mag flange. Click on the
diagram below for a 2 page .pdf of the idea. Please note that I
have not tried this yet...it is just to be used for interest and may
not fit like it is shown.

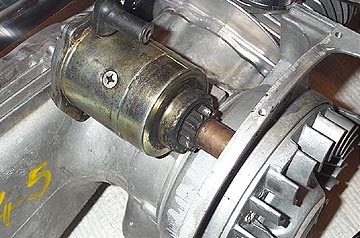
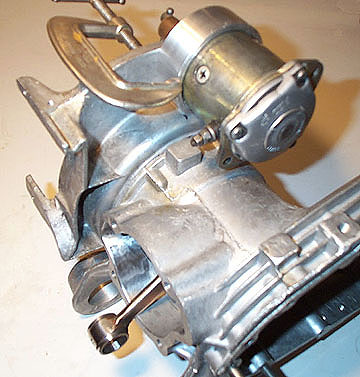
Below are a couple shots of the motor
placed in line, but with the mag flange not yet cut to allow the gear
through. These shots are of the bottom of the crankcase just in front
of the rear wheel. I'll update this page as things come together.
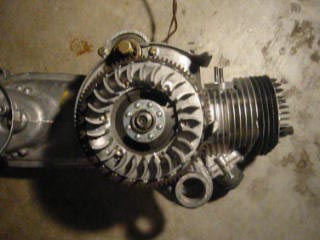
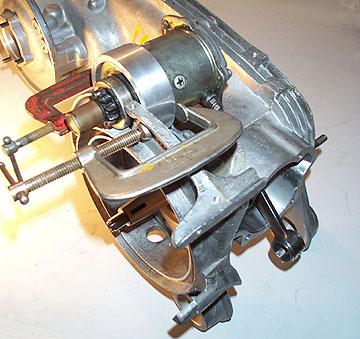
October 2002. I
finally had some time to work on this project again, and I took it as
far as I can go before welding. I cut a section out of the mag flange
and got the starter as close as I could to the flywheel. Unfortunately
I'll still need to fabricate a ring gear which has about a 1/2" larger
diameter than the flywheel which could create some clearance problems
at the top side of the mag flange.
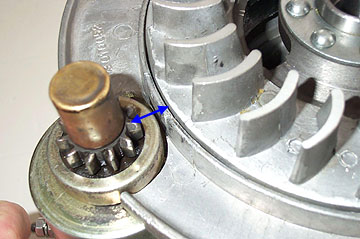
Above is a shot of where the starter
motor will be placed. I still need to have a retaining collar with an
internal diameter of the starter motor welded onto the mag flange to
hold it in place. The space between the bendix gear and the flywheel
will be bridged by a larger ring gear. In the picture below you can see
how far the ring gear will have to span (blue arrows).
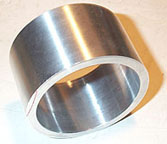
Next, I had to
find a way to mount the starter to the mag flange. I found that the
starter motor has a 0.5mm shoulder about 1.5cm from the face of the
housing, so I needed to find some aluminum tubing with exactly a 63mm
inside diameter. I couldn't find anything so I took a 3" diameter rod
to a friend who did a beautiful job of machining it down into ring on a
lathe (thanks Kyle).
From this point I has able to cut down
the length until the tubing depth positioned the gear at the right
height in relation to where the ring gear will be on the flywheel.
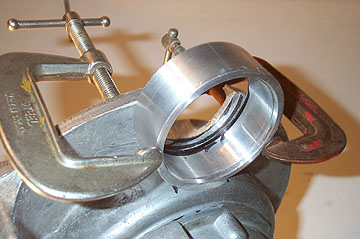
This is where the collar will be either
welded or bolted into position. To get as close to the flywheel as
possible, I flattened down the mag housing flywheel wall with a file. I
would like to weld this in place, but the inside diameter of the collar
is so close to the starter motor shoulder that I am worried the heat
may distort the machined diameter. I also fitted the crank and drive
side bearing only so I could be exactly sure where the flywheel will
sit. Below are to final shots of how the starter motor will sit below
the engine casings.
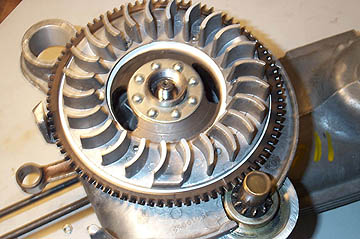
I managed to get my hands on a Vespa
flywheel ring gear which I adjusted to fit the Lambretta flywheel
diameter. I needed to remove 6 teeth and then have the circle re-welded
and bent to a correct circle again. The beauty of using the Vespa gear
is that it interfaces beautifully with the starter gear on the motor.
Before I cut the teeth out I drafted the gear with 93 teeth (original)
and worked my way down to 88 teeth. Each time I cut the new gear out of
card and tried it in place to be sure before cutting the original.
I removed the Lambretta fan by drilling
the rivets out and was able to locate the cardboard cut out over the
existing flywheel base.
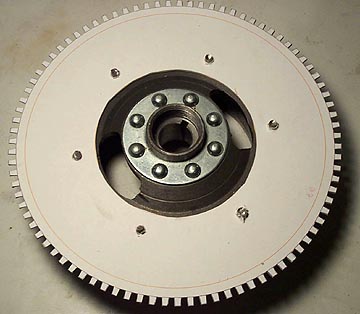
Above is a shot of the ring gear placed
over the cardboard gear for testing the fit. I now have to make a metal
center to the ring gear to mount it to the flywheel. Should be up and
working soon.
The final step
before building the rest of the motor was to test it out. I replaced
the bendix gear to make sure it was a good fit with the ring gear and
then fired it up with the help of a 12V-9ah battery that was fully
charged. Click to see an AVI movie
or Quicktime movie of the
starter in action.
|